The Non-Profit’s Guide to Drupal Structured Data SEO

Table of Contents
What is structured data SEO and why is it important for non-profits?
As an SEO professional, one of the first things I did to our site is implement structured data. The purpose of structured data is to provide information about a page and to categorize material on the page in a standardized format. We do that by applying the relevant schema markup.
For example, if you have an FAQ page answering questions about your work and your organization’s mission, you can use an FAQ schema. Schema (or schema markup), is a vocabulary that helps search engines understand the content and context of your website better.
With the FAQ schema applied, the questions and answers in your FAQ page will be organized in a way that will be easier for the search engines to understand (and present in a more user-friendly way).
In today's search environment, it's not enough to simply rank high on a SERP to get the traffic you want. To truly maximize your position and get the visibility you need for your organization, structured data must be leveraged to the fullest extent.
This blog is an easy-to-understand Drupal structured data SEO guide for you to accomplish just that.
How does structured data SEO help improve website visibility and user experience?
Structured data has two main benefits:
- It helps search engines understand your website better.
- It gives your users a more efficient and enjoyable search experience.
Structured data helps search engines understand your website better
Google is pretty smart when it comes to understanding what’s on your website, but that doesn’t mean it shouldn’t get a little help every now and then. Structured data helps search engines understand what your content is about and to accurately display that content in the search results.
By arranging data in a way that’s easier for Google to process, it can enable search results that are more engaging to your users which could encourage them to interact more with your website.
For example, Ashley Burns recently wrote an article answering accessibility questions she and the team got during the webinar we held with DubBot. Here’s what the structured data looks like for that article:
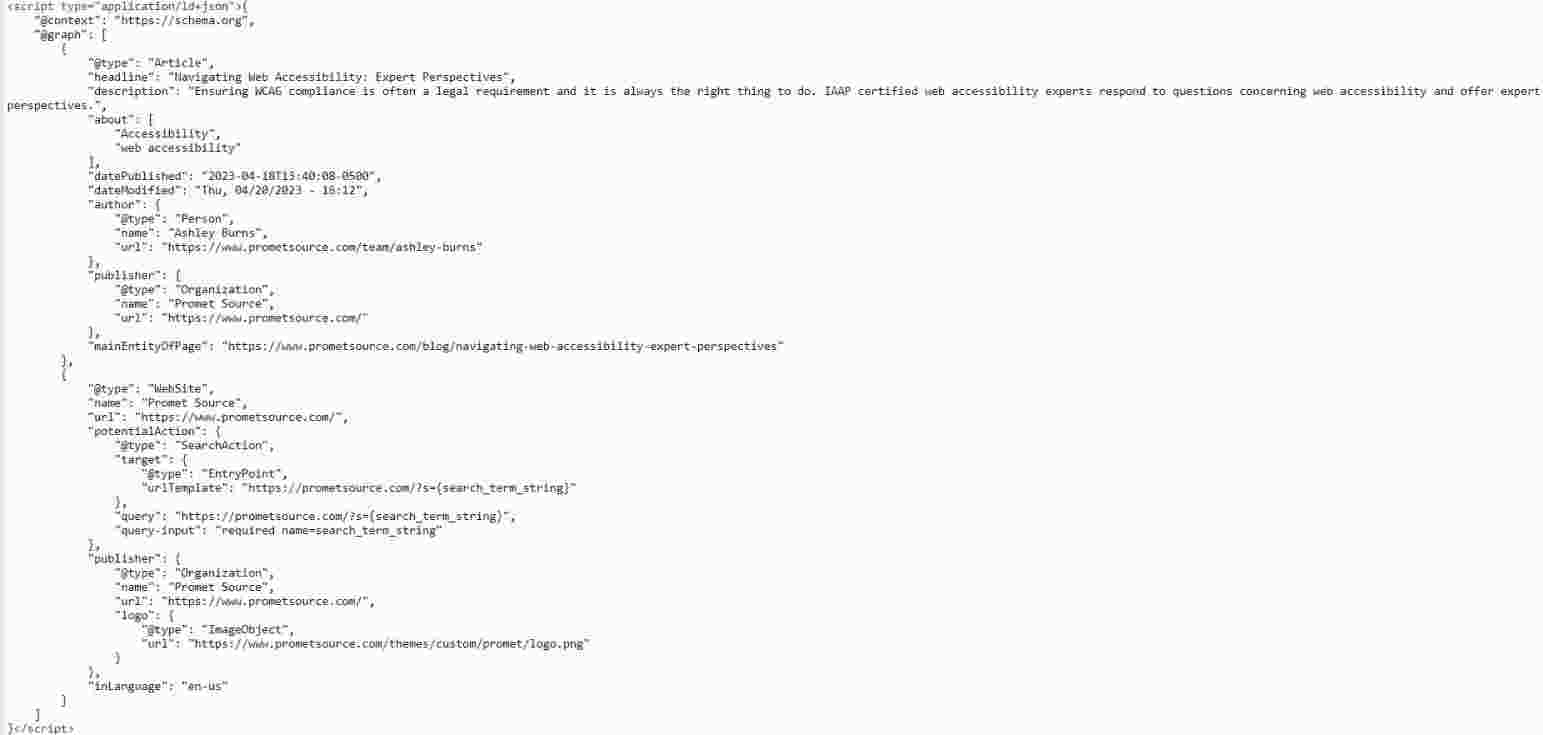
See how all the information is neatly laid out? That’s what we mean by structured data.
Structured data gives your users a more efficient and enjoyable search experience
The search engine results pages (SERPs) have rapidly evolved in recent years, giving users a better experience with their searches in the process. Because structured data is increasingly used, users are now receiving greater value from their searches, often getting the answers and information that they are looking for without the need to click beyond SERPs, which increasingly function as robust, information-packed resources in and of themselves.
These are called rich snippets and featured snippets.
What are rich snippets?
Rich snippets refer to organic search results that include enhanced information displayed on a result beyond the standard URL, title, and description. They serve to optimize search results with attention-grabbing information that will help it stand out with data such as hours of operation, ratings, reviews and more.

Users have come to count on rich snippets to streamline their search activity, since it gives valuable information right off the SERPs.
What are featured snippets?
Featured snippets appear at the top of the SERPs in “position zero.” They provide relevant answers to question-based queries.
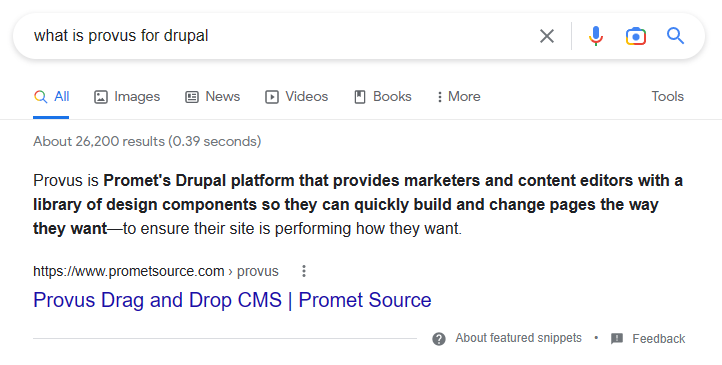
There are different kinds of featured snippets, all of which are explained in my blog on zero-click searches.
Are rich snippets and featured snippets guaranteed?
Unfortunately, the answer is no. Ultimately, it’s up to Google to decide how it wants to display your results, but that doesn’t mean you should just opt to not apply schema markup on your content. It’s always best to apply, test, and optimize.
Here’s what they say about it:
“Google does not guarantee that your page will appear exactly as shown here, or that any of the views shown will be applied to your page result; Google tries to show the best result for a search request, based on the user's search history, location, and many other variables.”
Which is why there’s more to optimizing content than just applying schema markup, but that doesn’t mean you should forego this one.
Read: Drupal SEO: The Ultimate Guide [2023]
What are the most relevant types of schema for non-profit org websites?
The most relevant schemas for your non-profit website would be:
- Logo (Organization)
- BlogPosting (and/or NewsArticle)
- FAQ
- WebSite
These are the ones I would suggest you start out with. Feel free to add more, but these should be the basics. If you want to check what other schemas would be relevant to your site, feel free to browse through the Schema.org website.
How to apply schema on your Drupal website
You only need a few things:
- The Schema.org Metatag module;
- A little dev time just to ensure the module runs smoothly with your website;
- The Schema Builder for Structured Data Chrome extension;
- Necessary information about your content, website, and organization;
- The Schema Markup Validator to validate your structured data; and
- Access to your website.
Steps 1 and 2: Install the Schema.org Metatag module and test it.
Steps 1 and 2 would be up to the developer, but you have to give some instructions.
- Ask them to install the module and QA to ensure it’s running smoothly. It’s highly unlikely that it will do anything concerning with your website, but it’s good to test anyway.
For example, I experienced an issue where we activated the Service schema and I couldn’t remove the information I added. Josh Estep, one of our amazing senior developers, figured out a way to tweak the schema to fix the issue.
- Here’s a message you can send to your dev team:
“Hello!
We’re adding some schema to our website. Kindly install the Schema.org Metatag module. Here’s the link: <add link>.
I need the following schemas to be added: Logo (Organization), Article (and/or NewsArticle), FAQ, and WebSite.
Additional instructions:
- Enable Logo (Organization) on the homepage or the about page.
- Enable BlogPosting (and/or NewsArticle) on the commentaries and blogs.
- Enable FAQ on FAQ pages.
- Enable WebSite globally.
Please cross-check with the schemas here <add schema.org link> to see if the fields are the same.
Thank you!”
Step 3: Download the Schema Builder for Structured Data Chrome extension then head to your website.
I’ll show you how to use the Chrome extension by giving an example.
One of our clients is the IF/THEN® Collection, a non-profit focused on women in STEM.

They don’t have schema applied to their website, so let’s see how we will populate the WebSite schema.
Note: The module you installed earlier in your Drupal website is where you ultimately input information. The Chrome extension is here because it’s easier to test and validate information by copying the markup it generates for you.
Populating the WebSite schema
When you click the Schema Builder extension, you’ll see the following:
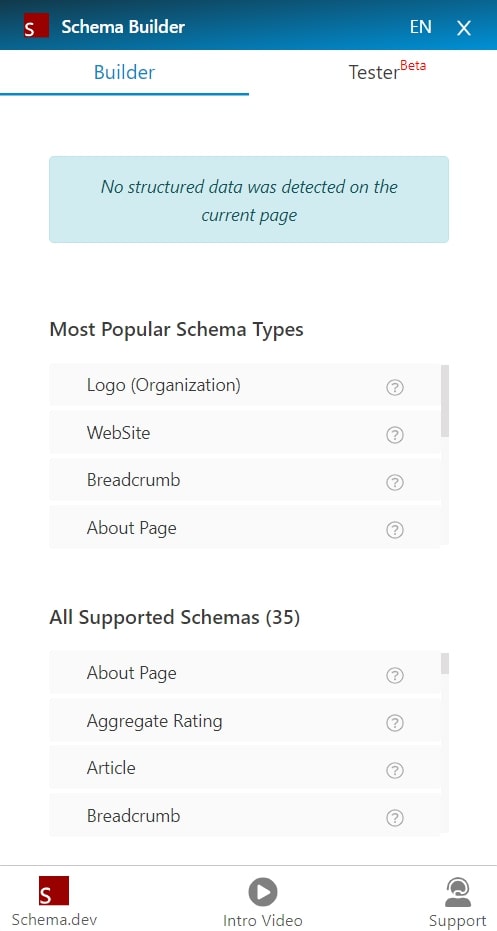
- Click the WebSite schema:
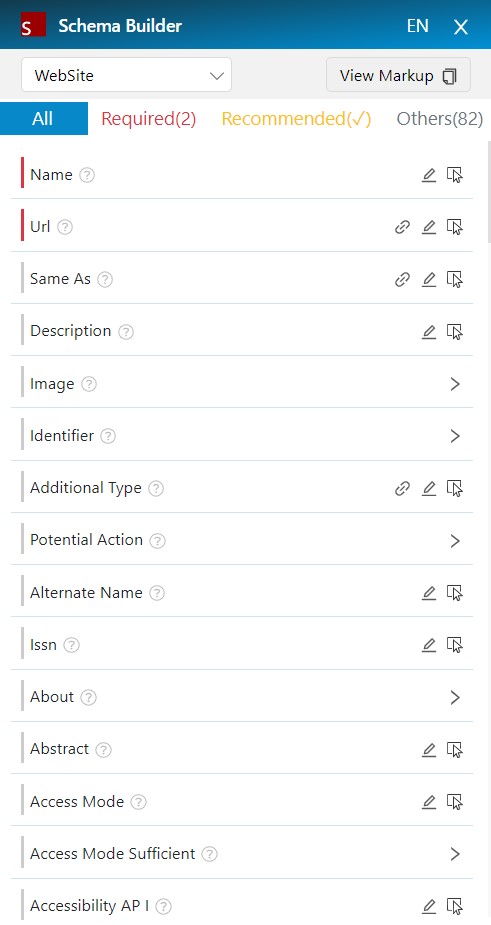
There you’ll see the Required and Recommended fields. Feel free to stick to them. The general rule when it comes to applying schema to your website is: Prioritize adding information you would want to see in rich results. That’s pretty much it.
Now, you’re probably confused what fields you would actually need to fill out. This is where this Chrome extension really shines.
- Go to a website that’s similar to yours. For example, if you have a non-profit website that focuses on women in STEM, then Google a website on that theme.
- Click the Schema Builder extension.
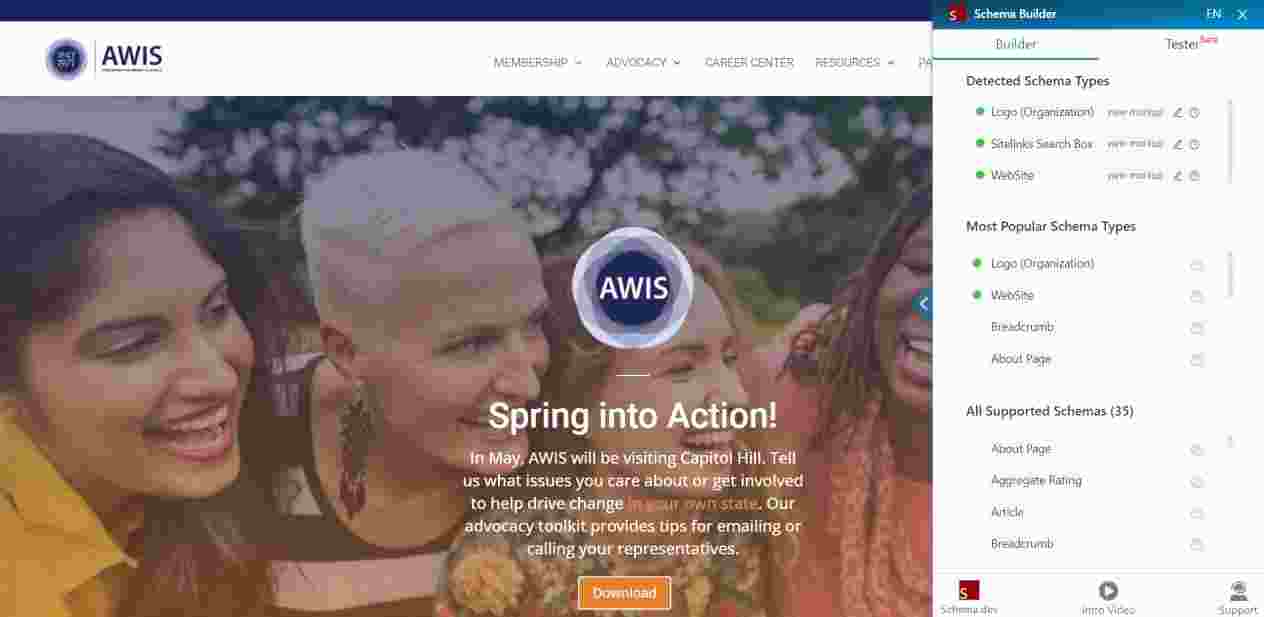
Ta-da! You have detected schema types, and one of them is WebSite.
- Add in at minimum the required information, then check the other fields in the other tabs to see which applies to your website.
- You can click and scroll around to see which fields they filled out. Or you can click View Markup.
This is what their code looks like:
<script type="application/ld+json">
{
  "@context": "https://schema.org/",
  "@type": "WebSite",
  "name": "AWIS",
  "url": "https://awis.org/",
  "potentialAction": {
    "@type": "SearchAction",
    "target": "https://awis.org/?s={search_term_string}",
    "query-input": "required name=search_term_string"
  },
  "alternateName": "Association for Women in Science"
}
</script>
You can do this process to other websites as well to see how they differ.
- Once you have an idea of what to put in your schema, head to your website and log in.
Now, there are two ways to go about this. One is using the Schema Builder Chrome extension to first test out your own code. Second is to go straight to your website and input the details. I suggest to go the first route first so you know what you should be seeing.
Let’s say you have the details all worked out in the Schema Builder, then you go to your website and realize that the module doesn’t have the fields you need. You can send instructions to your developer and ask them to tweak the module. And you can only do that if you actually know what you need.
- Click the Schema Builder extension again and input your details to the appropriate fields.
- I decided to not use alternateName, but I am using Publisher. Tweak as you see fit.
- Click View Markup. You’ll see what the code looks like. Here’s mine:
<script type="application/ld+json">
{
  "@context": "https://schema.org/",
  "@type": "WebSite",
  "name": "IF/THEN® Collection",
  "url": "https://www.ifthencollection.org/",
  "potentialAction": {
    "@type": "SearchAction",
    "target": "https://www.ifthencollection.org/?s={search_term_string}",
    "query-input": "required name=search_term_string"
  },
  "publisher": {
    "@type": "Organization",
    "logo": "https://www.ifthencollection.org/themes/custom/ifthen/img/logo.png",
    "name": "IF/THEN® Collection",
    "url": "https://www.ifthencollection.org/"
  }
}
</script>
Step 4: Test your code.
There are two types of test you can do after.
- Click the Test on Google button:
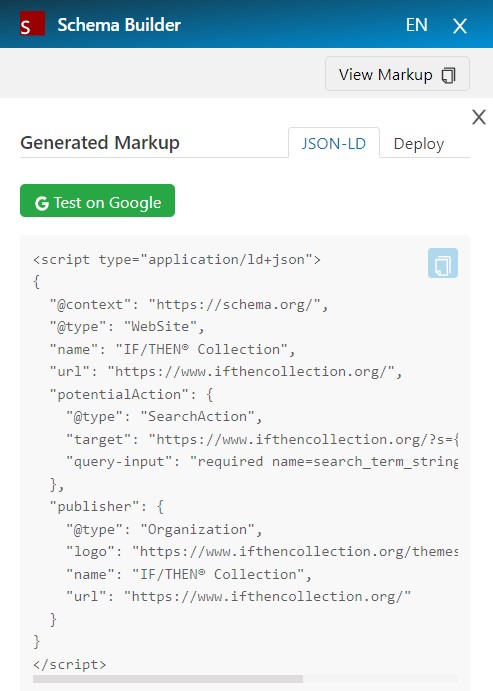
It will take you to the Rich Results test. It will tell you if the code you generated is eligible for Google’s rich results.
The other one is the Schema Markup Validator.
- Click New Test and paste the code in the Code Snippet box.
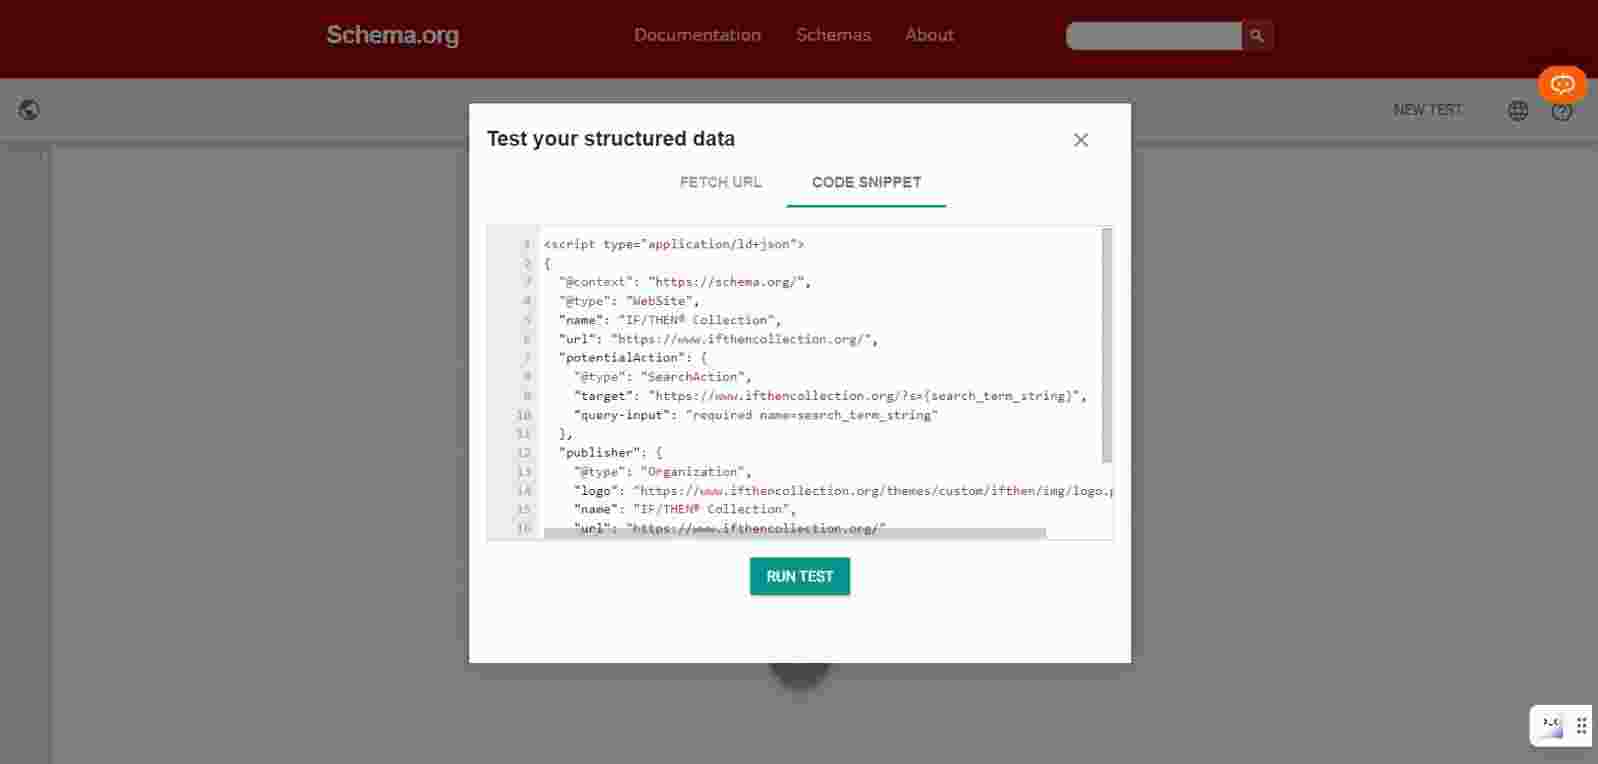
- Run the test. If you see zero errors and warnings, you’re good to go.
Step 5: Add the information to your website.
Now that you’re sure your code is ready, it’s time to add the details to your website.
- Go to Configuration > Search and metadata > Metatag.
- You’ll see different types, their status, and the operations option. Click the Edit button next to Global.

- Click the titles to minimize them until the only box that’s open is SCHEMA.ORG: WEBSITE.
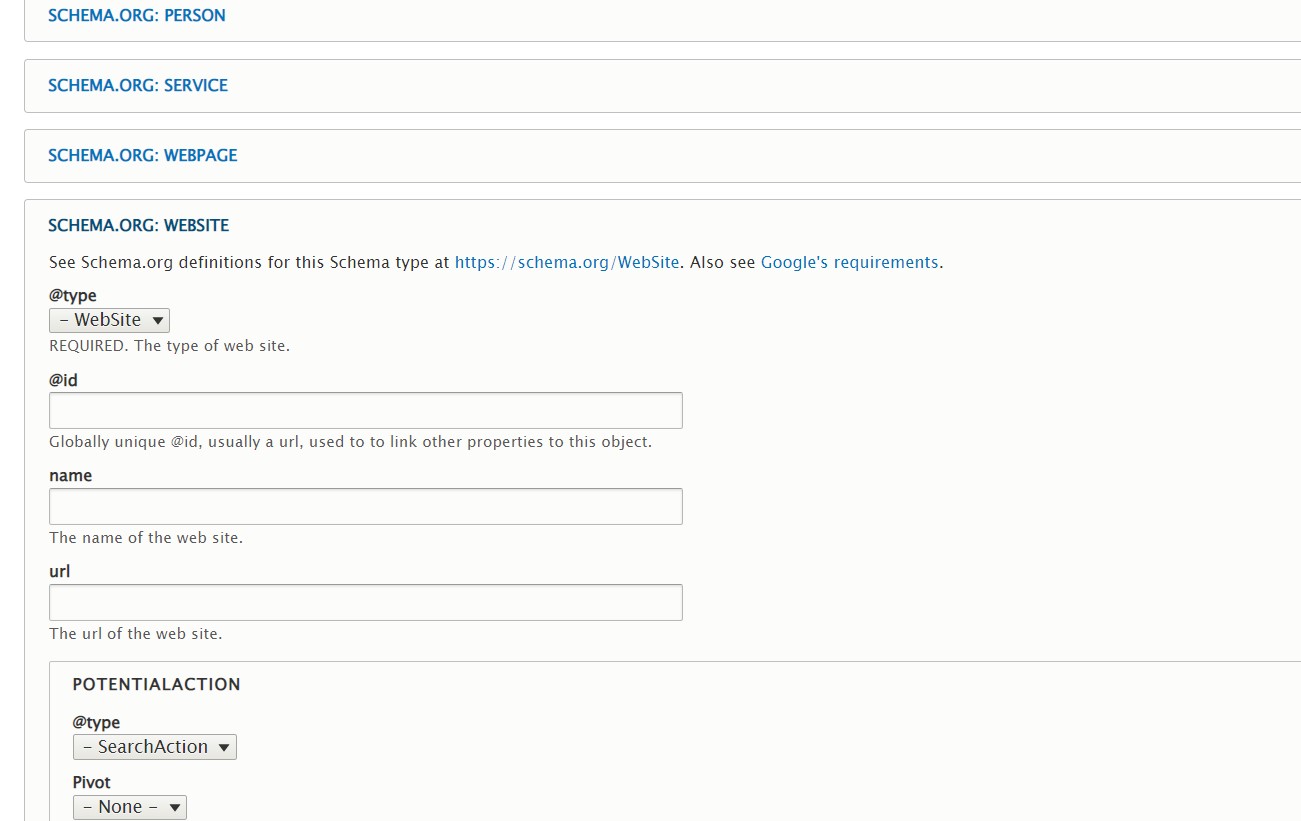
- Fill in the details.
- Click Active then hit Save.
You’re done!
Since the other schema types aren’t applied globally, you will have to manually fill out the details. One tip I can give is to ask your developers for tokens that can be applied globally. For example, instead of you having to write down your blog title in every entry, you can simply add [node:title] in the Headline field and it will automatically populate with your H1.
Conclusion
Applying schema markup to your Drupal website to ensure you have structured data is one of the important steps you can take to help your non-profit organization have a fighting chance in the volatile world of search. By having structured data, your webpages become eligible for more interactive results on the SERPs, becoming more engaging and eye-catching for your target audience.
Looking to have a website that’s optimized for your target audience? Contact us today for your SEO needs.
Get our newsletter
Get weekly Drupal and AI technology advancement news, pro tips, ideas, insights, and more.


